

How to Disable Laptop Keyboard on Windows 11
Everybody knows it is impossible to operate their laptop system without a keyboard. Many users appreciate the accessibility to disable their laptop keyboard under certain conditions when they prefer alternative input methods or need to focus solely on touchscreen functionality.
Providentially, you can apply two easy methods to turn off your keyboard laptop using Windows 11 system. In this step-by-step guide, you will acquire how to do it, so let’s navigate to it.
Read More: https://www.thebigpicturemovie.com/microsoft-mouse-and-keyboard-center/
2 Ways to Disable the Keyboard Laptop on Windows 11
- Turn your laptop keyboard off via the device manager
- Deactivate your laptop keyboard via the command prompt
Suppose you have a built-in touchscreen laptop with the Windows 11 system and are not planning on typing for an hour or longer. Accordingly, turning off your device’s keyboard is the best option.
While windows 11 is the most up-to-date and exhilarating version of the Windows successions. That emanates with a particularly convenient thing for users. It also offers its users to close the built-in keyboard when they want in simple steps.
Below we have shared 2 easy methods that allow users to disable their laptop keyboard.
Use the Device Manager to Turn off your Laptop Keyboard
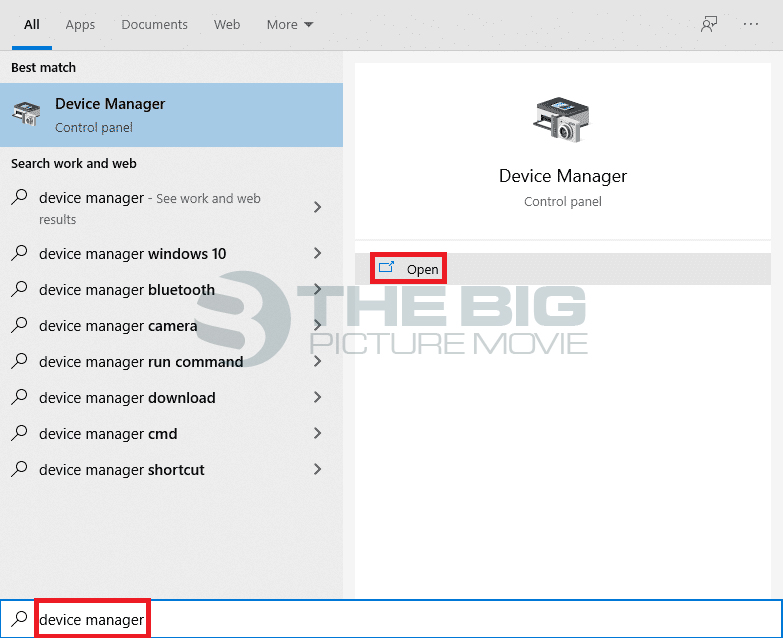
- Type the device manager in the Windows search box available at the bottom left corner of the taskbar.
- Launch the device manager and discover the Keyboards option from that page.
- Double-click on it. After that, you will see a list of all linked keyboards to your laptop.
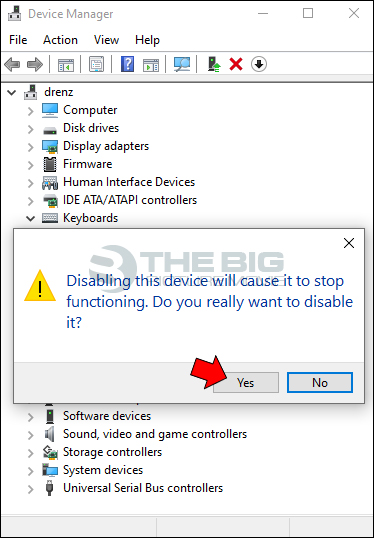
- Here right, click on the built-in or standard keyboard option. A small pop-up window of options will appear.

- Select the Disable option from the pop-up menu options list.

- Then tap on the Yes button to confirm the disabling.
- After that, you will incite to restart your laptop to complete the procedure.

While certain laptops may not have a disable option and instead offer an uninstall device alternative. Plus, it is important to note that these steps are not permanent. However, the positive aspect is that your laptop will automatically re-enable the keyboard upon restarting, ensuring uninterrupted functionality and convenience.
Furthermore, you can easily return to the keyboard section whenever you wish to turn it back on, allowing for a seamless transition and effortless reactivation.
Disable your Laptop Keyboard by Using the Command Cue
- Type and enter the cmd in the Windows search bar you will grasp at the bottom left side of the taskbar.
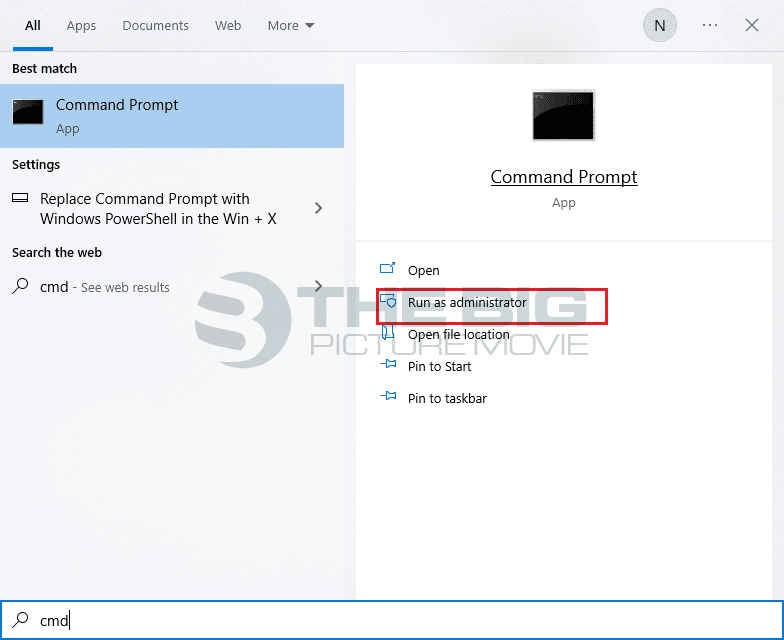
- Click on the Run as Administrator; you will see below the command prompt option.
- Tap the yes button to confirm that you want to launch the command prompt app on your device.
- Type sc config i8042prt start= disabled command line when the command window unlocks.
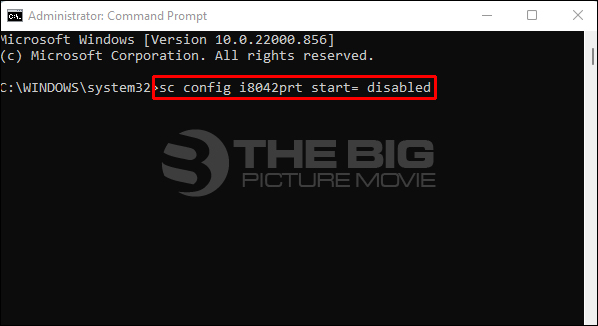
- After that, hit on the enter key and restart your laptop to complete the disable your laptop keyboard procedure.
If you want to enable your device keyboard using the command prompt app, type and enter the below-mentioned command.
sc config i8042prt start= auto
Summing Up
Disabling your laptop’s built-in or standard keyboard can help you avoid unintentional key button presses when you are not typing or typing with an external keyboard.
In this post, we have explained how you can disable the keyboard of your laptop with 2 convenient methods. However, it is vital to remember to re-enable your device’s standard keyboard when you finish your nonkeyboard task using the abovementioned methods.
Let us know your thoughts and experience if you have ever attempted to disable the keyboard using the abovementioned methods.
Related Posts

Top 5 Ways to Turn Off Pop Up Blocker on iPhone (2023)

How to Cancel My Peacock Subscription
