
How to Screen Record on Chromebook
Do you want to record any screen on your Chromebook? If you run Chrome OS 89 or later versions, you can access an integral screen recording tool to record your Chrome book’s screen. You can freely use it by pressing Ctrl+Shift+ Show Windows, then choose the video camera option.
Whether you have to record the screen for tech support, the app’s behavior, or just want to document something. Chrome’s handy built-in screen recorder lets you capture videos of your screen activity. It will help you to record the whole screen, a single tab, and a particular window.
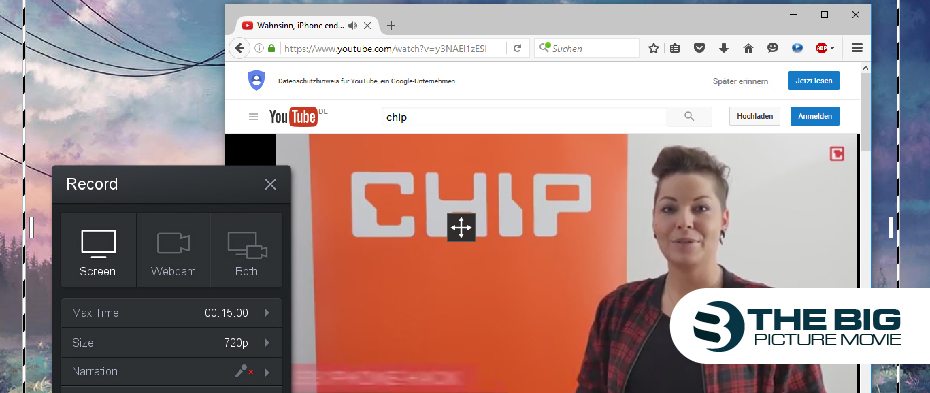
However, there are various browser-based recording apps for Chromebook users. So let’s learn the possible ways to record on a Chromebook.
How to Screen Record on Chromebook via Screen Capture
When you wish to screen record on a Chromebook, you’ll have to pull up the window you want to take a screenshot.
To start screen recording on a Chromebook, you will have to access the toolbar used for capturing screenshots. However, while pulling up the toolbar, the process of screen recording on a Chromebook differs notably. Here’s how you can record on Chrome:
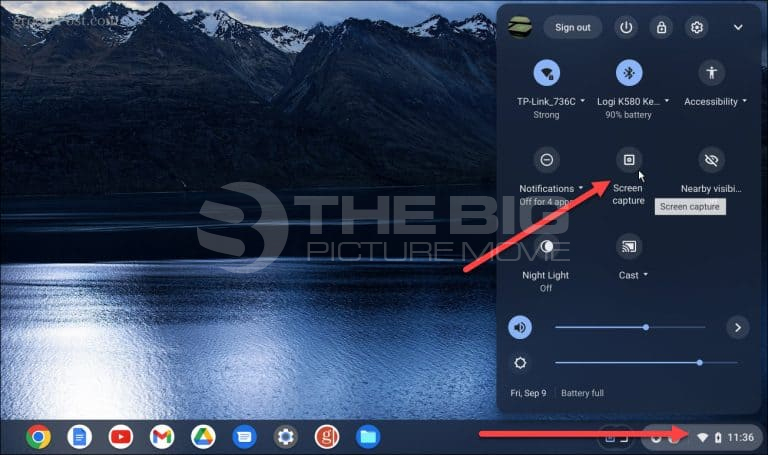
- Tap the shelf with the clock, Wifi & battery icons, and tap the screen capture option.
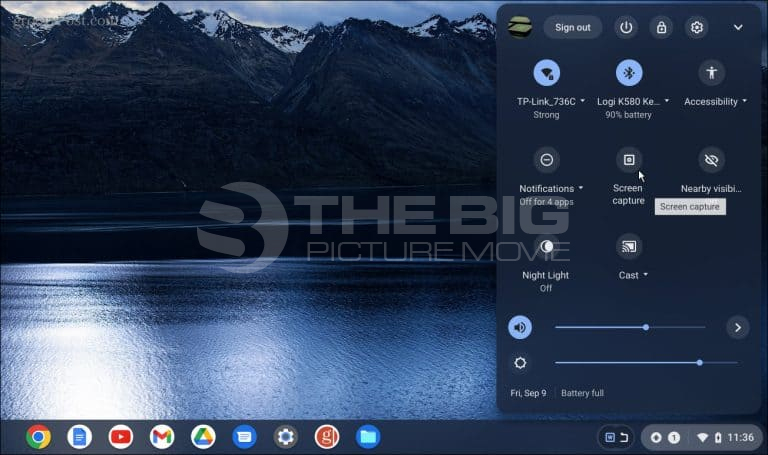
- If you don’t see it initially, navigate to the menu, and tap the Up Arrow to expand the menu completely.

- You can tap the screen capture option when the menu is completely expanded.
- The screen capture option will appear; now, choose the video icon to screen record. Otherwise, it will end up taking screenshots if you don’t select the camera icon.
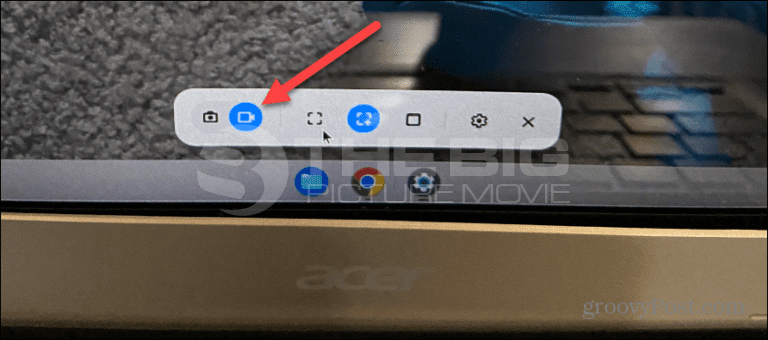
- The toolbar offers a few different recording options, such as recording the whole screen, a particular window, or a partial screen.
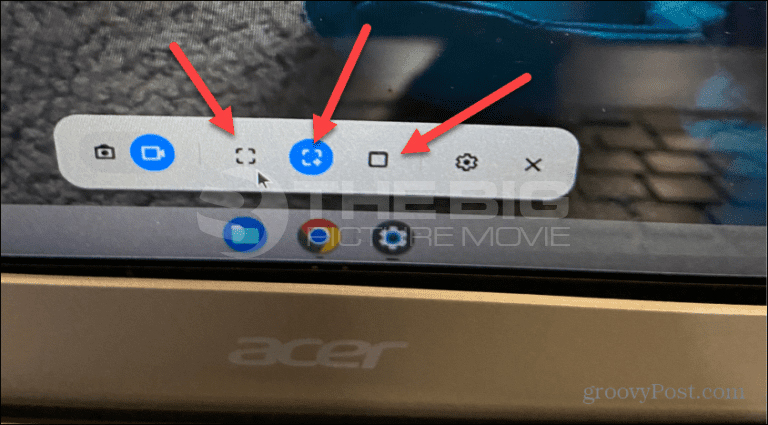
- Select how you desire to record the screen, and it will start directly. Although, if you select partial or a particular window. It will wait while you choose the screen area to record.
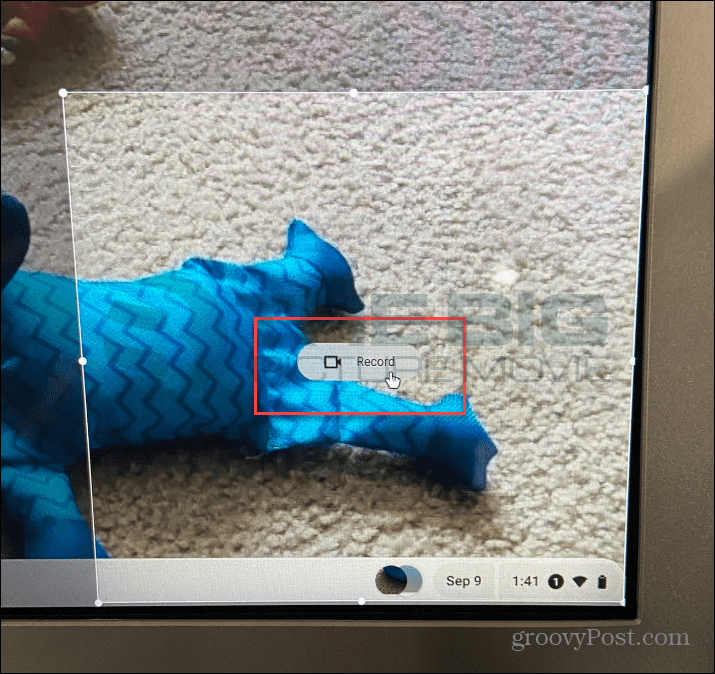
- Next, tap the Record option in your preferred screen section.
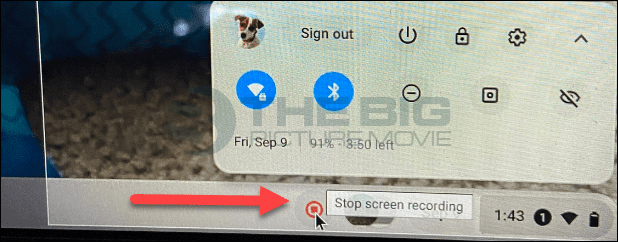
- A red recording option will emerge on the taskbar, and you can tap it when you want the recording session to stop.
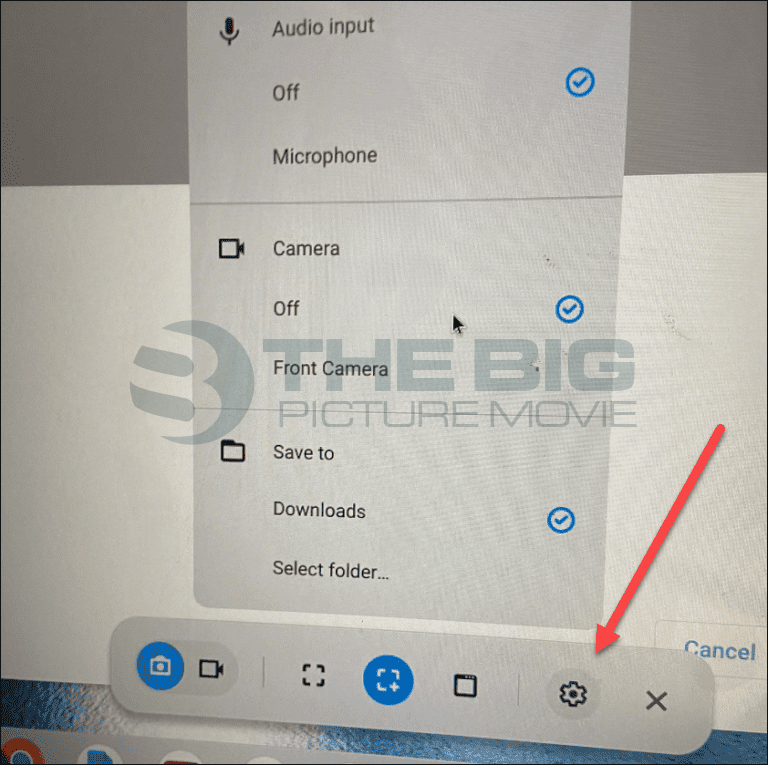
- It’s also crucial to note that you can modify screen recorder settings before taking a shot. Tap the settings to select a different save location, turn on/off the front camera and turn on/off the microphone.
Once you have done recording, tap the red stop option on the shelf. Your recording will be saved in the “My Screencast” section of the Screencast app.
Use Keyboard Shortcuts
Before delving into detail, it’s essential to note that they come in two kinds Global and browser-specific. It means global shortcuts will function in whatever app or window you have open, and the browser-specific shortcuts only work in Chrome or when a browser extension has been downloaded. Here we have some global keyboard shortcuts to assist you in the recording:
- Ctrl + Alt + R – starts/stops a recording
- Ctrl + Shift + P – pauses/resumes a recording
- F11 – full-screen mode
- Esc – stops a recording or exits full-screen mode
- Ctrl + Alt + Shift + R – displays the recording options dialog box.
You can also use some particular shortcuts that you can use to screen record, such as Ctrl+Shift+H initiates and stops the video recording, while Ctrl+Shift+U takes a screenshot of what’s currently on the screen.
How to Find Screen Record Files on Chromebook
You can check your screen-recorded files in your downloads folder. A popup will emerge after you finish recording; you can show it in the folder. Although, you may have to share or play your screen recording first. If so, double-tap the file (saved in the WEBM format). Here’s how you can do it:
- Tap the file’s icon, move to your downloads folder, and find your recording.
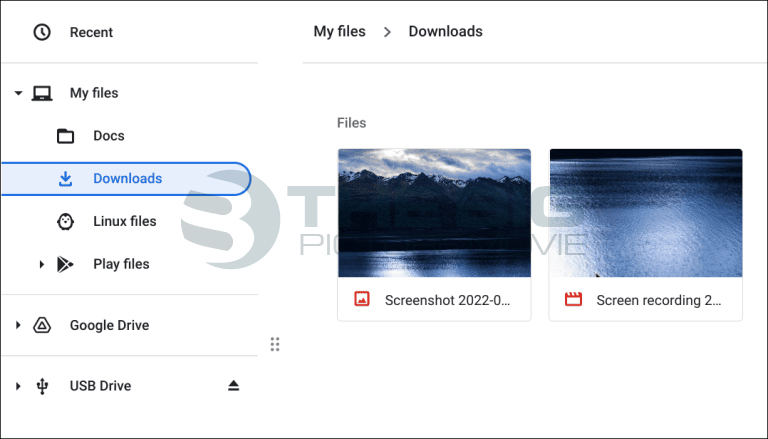
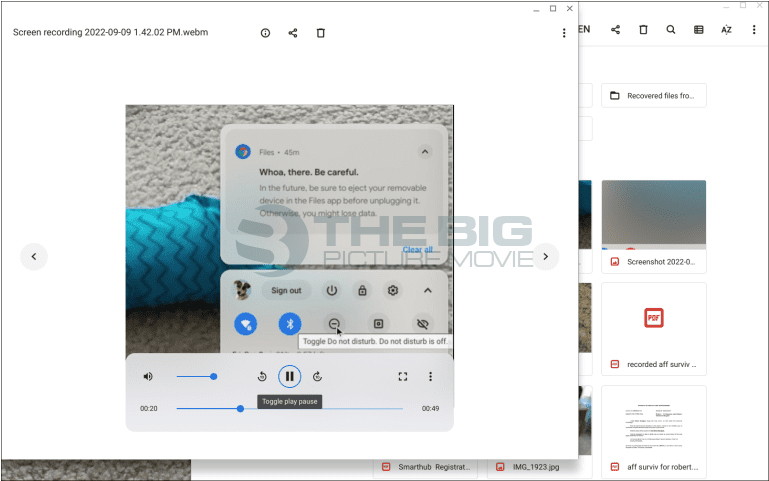
- To play a video, double-tap it to start playing. The player includes basic playback controls so you can plan through the video. Once you find the files, you can share, save or watch them.
How to Screen Record on Chrome with Screencast
Google newly launched a screen recording app on Chromebook known as Screencast. If you have updated your Chromebook to Chrome OS 103, you will find the Screencast in the app drawer. Screencast is a powerful screen recording tool designed mainly for teachers and students, although anyone can benefit from its amazing features, such as you can add your face using the webcam, produce transcripts, offer translations, and more.
Remember that the Screencast only works if your system’s language is set to US (English). Now follow the below steps to record with Screencast.
- First, ensure you have updated Chrome OS, then go to the App drawer and tap Screencast app.
- Second, tap “New Screencast” at the upper-left to start screen recording.
- Third, you can select the full-screen area, window, or partial area to record the screen. The microphone and webcam are enabled by default, which can be turned off from the settings icon.
- Now, tap the red option on the shelf to begin the recording, tap the “pen” option for annotations, and drag the webcam view to any corner you want.
- When you are done, tap the red stop button on the Chrome OS shelf.
- You will get your recording in the Screencast app, where you can review, edit, or share it.
Final Words
We have mentioned a method to screen record on Chromebook; you can use Chrome’s built-in screen recorder. Moreover, you can also use third-party apps, which let you screen recording for free. But we recommend you use Chrome’s built-in screen recorder Screencast for recording. Hope this article will be helpful for you. Feel free to ask any queries regarding the topic.
Related Posts
Top 5 Ways to Turn Off Pop Up Blocker on iPhone (2023)

How to Cancel My Peacock Subscription
