![How to Overclock Monitor [4 Ways]](https://www.thebigpicturemovie.com/wp-content/uploads/2023/06/how-to-overclock-monitor.jpg)
How to Overclock Monitor [4 Ways]
Every gamer wants a quicker and smoother in-game experience while playing. A gamer will love the outcomes after overclocking their computer monitor. But do you know how to overclock your monitor?
In this post, we have described four easy methods to overclock your system.
Read More: https://www.thebigpicturemovie.com/how-to-uninstall-steam/
Do you Know About Monitor Overclocking?
Basically, it is all about going past your monitor marketed refresh rate or clock rate. The refresh is the speed at which a computer chip can perform every instruction or task in a given cycle. That is measured in hertz (HZ), and one-hertz contemporaries one tick per second.
However, a tick refers to a switch that turns on and off each time the processor completes an action task or instruction, and the next one can safely occur. While all monitors have an advertised refresh rate starting at 60Hz for office monitors and can go up to 240Hz, 360Hz, and 500Hz.
The advertised refresh rate is the one you should expect to get from your monitor when making a purchase. Users can select this refresh rate in the standard Windows display settings without requiring additional software.
Remember that the faster your clock rate, the higher the frequency ticks, and the quicker your device can execute an instruction. So, when you overlock your monitor, it will increase the tick at a higher rate than it was primarily assembled to run by the certified manufacturer to speed up the processing times. Moreover, it can ultimately recover the smoothness of your overall experience.
4 Simple Ways to Overclock Your Monitor
As we tell you above, overclocking your system helps you get a higher frame rate. That gives users a competitive edge in online gaming and improves the overall experience.
Most systems can be overclocked by at least a little, but it depends on the aptitudes of your system. Below we have mentioned ways to overclock your system to increase the refresh rate inaccessible in the Windows settings.
NOTE: Remember that by adhering to the specifications and not pushing the limits of your system via overclocking. You can ensure optimal performance while preserving the valuable warranty the manufacturer provides. So keep it cautiously while doing so.
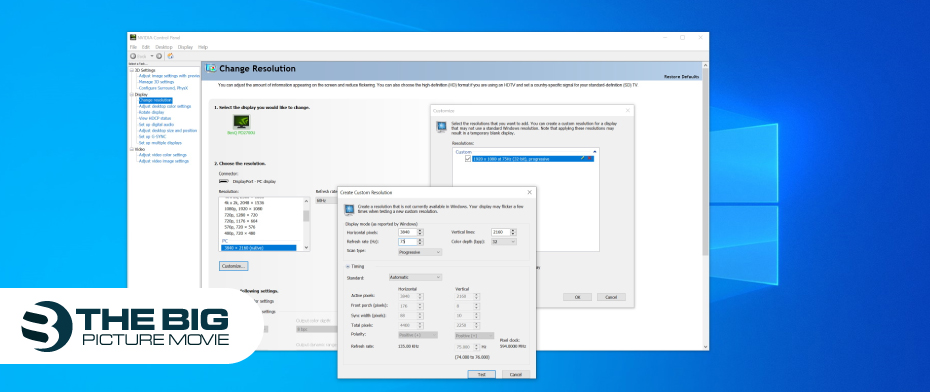
1. Overclock your System Via Nvidia Control Panel
- At first, right-click on your desktop. Then tap on the Nvidia control panel from the small pop-up menu window to overclock your monitor.
- After that, click on the change resolution option that you will see at the left corner of the menu bar.
- Tap on the customize option. Then a pop-up panel will appear on your monitor screen.
- Here checkmark the enable resolutions not exposed by the display option.
- Now hit the create custom resolution option and the Accept button after reading the legal disclaimer resolution.
- After that, enter a new custom refresh rate using the Refresh Rate (Hz) option.
- Then tap the Test option at the bottom to check if your monitor can handle the new refresh rate.
- A pop-up window page will appear on your screen; if you want to keep the resolution, tap the Yes button.
- After that, you will see your new custom resolution in the list of custom resolutions here. Hit the OK button.
- Choose your preferred refresh rate from the refresh rate (Hz) option and tap the Apply button to add a new refresh rate on your monitor.
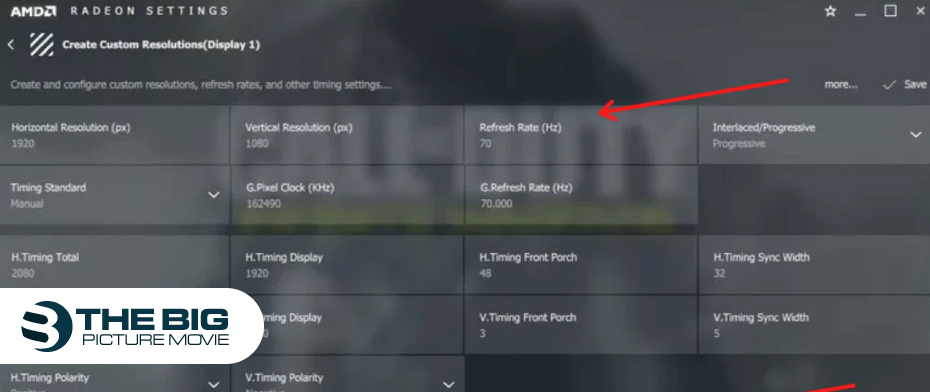
2. Overclock your Monitor Using AMD Radeon Settings
- Right-click on your desktop, then tap on the AMD Radeon settings from a pop-up menu window.
- The settings app of AMD Radeon will display on your screen. Here click on the Display option.
- Next to the custom resolution, you will see Create New+ option tap on that.
- After that, enter a new refresh rate next to the Refresh Rate option and hit the save button.
- Then navigate to the Windows Display settings. Here, click on the Advanced display option.
- Now tap on the display adapter properties to open the monitor display settings.
- Here click on the Monitor option and choose the refresh rate from the screen refresh rate option.
- After that, hit the Apply button to overclock your monitor to your preferred refresh rate.
NOTE: Remember if your system cannot hold the new refresh rate. Then, scale it back and discover the exact frame rate your system can hold.
3. Increase the Refresh Rate of your Monitor Via Intel HD Graphics Control Panel
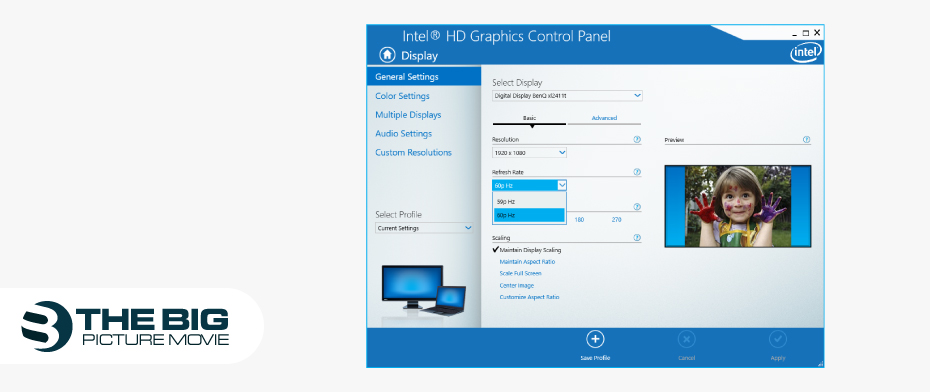
- First off, right-click on your desktop. After that, click on the Graphics properties from the pop-up menu window.
- Tap on the Display option from Intel HD Graphics Control Panel settings page.
- After that, click on the Custom resolution from the display side menu panel.
- Now enter the new refresh rate you will grasp next to the Refresh rate option.
- Then hit the Add button you will grasp at the bottom right side of the refresh rate page.
NOTE: It will change immediately if your system can hold the new refresh rate. If it can, your monitor screen will go black for 20 seconds before reverting to the prior settings.
4. Overclock your Monitor from Custom Resolution Utility (CRU)
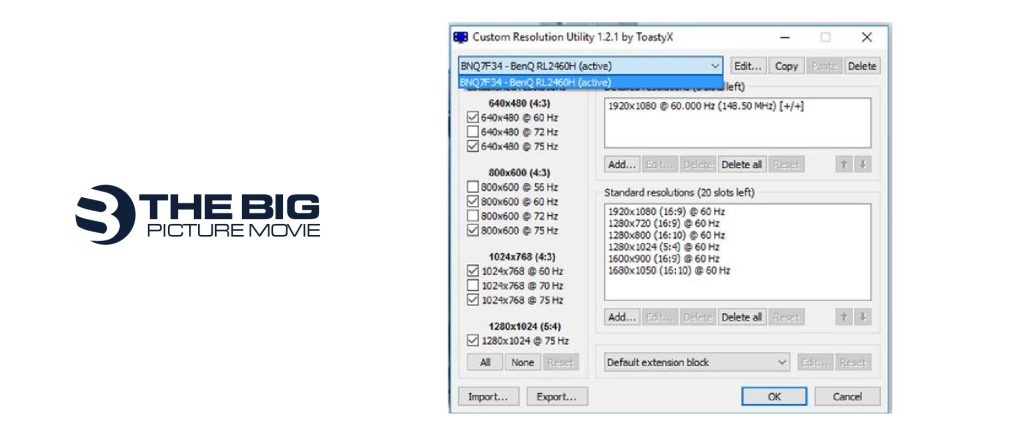
The Custom Resolution Utility (CRU) is a third-party tool that lets users make a custom resolution on any Windows PC. So if users want to increase their monitor’s refresh rate, they must install the cru on their system.
After downloading the CRU, follow the below-mentioned steps to overclock your computer.
- Hit the add button on the custom resolution settings to create a new resolution.
- After that pop-up resolution page appears on your screen. Here enter a new refresh rate.
- Then click on the OK button to save the new refresh rate.
- Now select the new custom resolution, then you will see the up arrow; click it to move the new refresh rate to the top.
- Open the CRU file. After that, the screen will blink a few times, showing the graphic drivers have been reset.
- Now navigate to your system’s display settings and tap on the Advanced display settings.
- Here hit the Monitor option and choose your preferred refresh rate.
- Tap on the Apply button to put on the new refresh rate. That’s it.
Our Verdict
Don’t meet your greet if you want a higher refresh rate and all the abovementioned methods. So you can consider investing in a higher refresh rate monitor to overclock your Monitor.
I hope this guide will help you to overclock your system securely. If you encountered any issues when processing the new refresh rate on your system.