
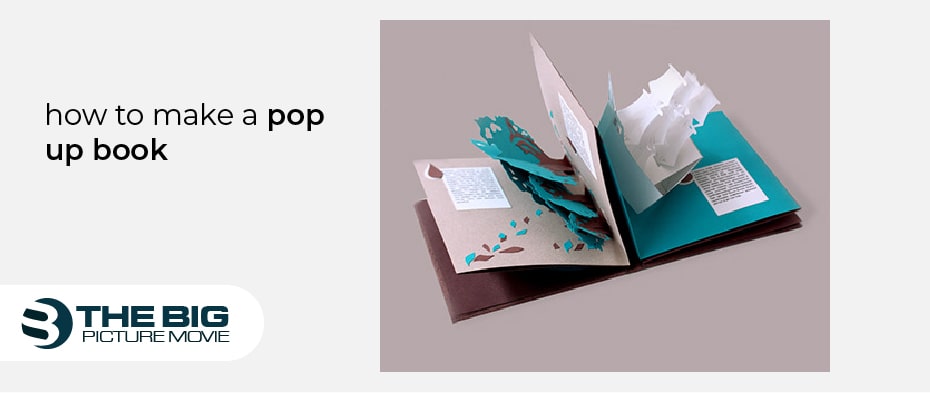
How to Make A Pop Up Book With My Craft Box?
Animals, space, stories, and pop-up animated books with beautiful 3D images and shapes on the book’s pages inspire everyone. However, making a pop-up book seemed like a mystery, taking time and requiring much effort.
But I was determined to solve this mystery and search out how to make such a book from your craft box in less time and effort.
Let’s explore with us!
Things You Need to Make a Pop-Up Book
Constructing and learning how to create a popup book will become easier when you have everything you need beforehand. The stuff you need would depend upon your project.
You need a few basic materials to make a 3D popup book.
- Glue
- Pair of Scissors
- White index cards
- Colorful index cards
- HB pencil
- Eraser
- Color Pencil
- Watercolor or Acrylic Paints
Once you have collected all your stuff, create a small storyboard. It will help you outline your story and decide on your 3D elements beforehand. It will save you time and effort.
Furthermore, you also need three to four hours to make an exciting book.
Steps to Create a Pop-Up Book With Your Craft Box
Pop-up books are basically three-dimensional pages. Designing and constructing these books in arts is also acknowledged as paper engineering. If you want to make a book like this to make an addition to your artwork or teach your toddler via the pop-up book. Or, for whatever reason, you want to make it.
Below we have shared a step-by-step guide that you can use to make your exciting pop-up book.
Step 1: Select a Fascinating Topic (Fiction or Non Fiction)
If you want to select the fiction subject for your book, then you have to go with a short yet classic folk tale, or you may write your own story. But if you select a non-fiction subject, choose a fascinating topic a child discovers. For instance, animals, space, or cartoons.
Step 2: Limit the Number of Pop Up Elements
When you keep it simple, it prevents your pages from becoming too weak to stand. The lower cuts you create in your pages will make the pages more hard-wearing.
However, you may add other craft elements to make it more stimulating. But too many of these will make your pages look messy yet busy and weigh them down needlessly.
Step 3: Make A Storyboard For Your Pop-Up Book
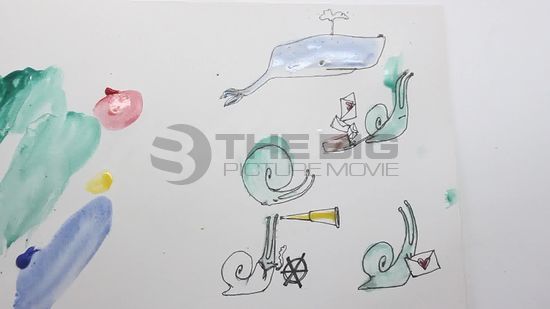
After that, write a story or script on notepaper, parting it into different paragraphs or lines when you expected needing a new page. Now Sketch a rough draft of the illustrations you will use for each page.
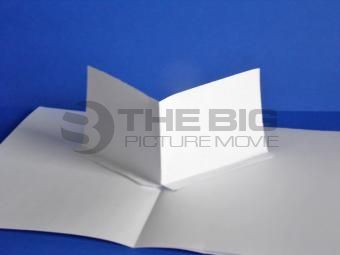
Step 4: Start the Design to Fold a Strong Piece of Paper
You can use cardstock, thin poster paper, or scrapbook Paper of almost 9 by 12 inches or 23 by 30 cm. Make sure the paper must be thicker rather than ordinary paper. Fold the Paper in half horizontally to make the cover of your pop-up book.
Step 5: Cut 2 Slits in the Center of the Paper

Now you have to cut the Paper from the center, which should be in the horizontal slits. Make sure the slits must be about 2 inches or 5 cm long and spaced about 1 inch or 2.5 cm apart.
After that, open your Paper and put it vertically so that its height appears longer than its width. You can use your finger, a thin pencil, or a pen to open the tab slightly.
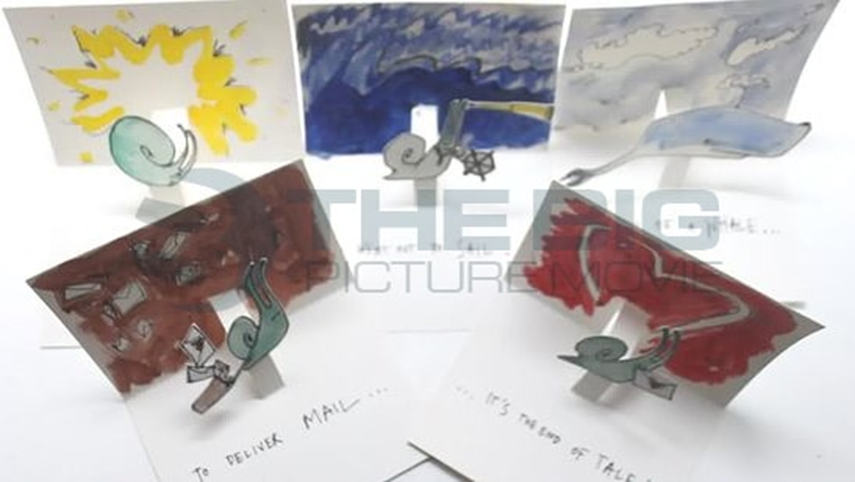
Step 6: Draw and Color the Illustrations of your Pop Up Book
Then draw any picture and color the illustrations properly on separate sheets. You can also cut the pictures from photographs magazines or recycled picture books and paste those pictures on the cardstock.
Furthermore, make sure that the pictures you make or paste are according to the size of your book page.
Step 7: Make As Many Pages as Mandatory

After that, use the same cutting and folding method mentioned in step 5 and make as many pages as possible to conclude your story. However, review your story and check out the illustrations and pictures planned out accordingly and the test.
Step 8: Write Down the Text
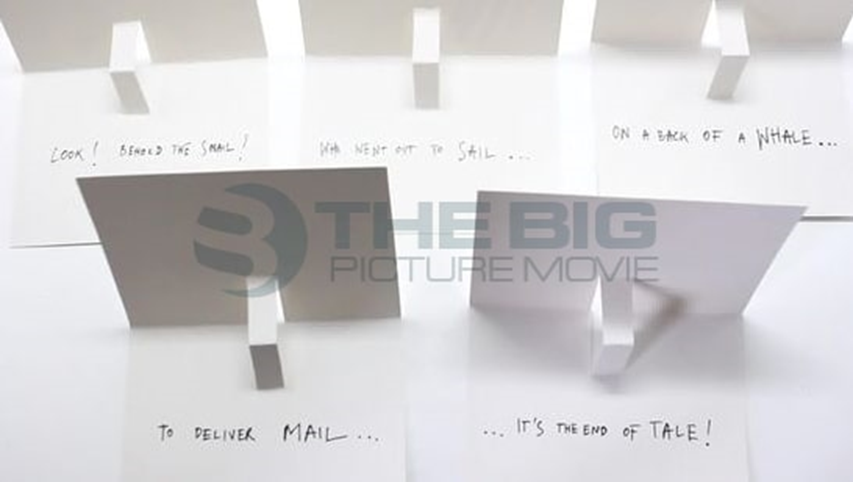
Now start writing the text to the bottom of every page chronologically of your pop-up book. If you have more text and don’t have a page left, attach a piece of paper that folds out upon opening to the too-small text area.
Step 9: Design and Decorate the Background of Each Page
You can draw anything in the background and color it with a pencil or paint. Leave the tabs blank. After completing it, make sure to remove pencil lines with a good eraser.
Step 10: Cut and Paste the Illustrations
After cutting all the illustrations and pictures, start gluing them to the back onto their corresponding tab. Please do not let it get stuck to the background portion of the page, or it can’t pop up.
Step 11: Glue the Pages of your Pop Up Book

The upper outer side of the second page will be pasted to the lower outer half of the first page. You will endure this pattern till you get all the pages attached.
Don’t glue any popup tabs together, or it will stop them from popping up.
Step 12: Make An Outside Cover
Doubling a sheet that should be bigger than the rest of the pop-up book. Slide the creased paper away from the book and embellish the back with markers or drawings and the front outside covers.
After that, glue the back and front internal covers to the first and last pages of the book. Your book is ready to be read when the glue has dried entirely.
Enjoy your Reading!
Related Posts

Top 5 Ways to Turn Off Pop Up Blocker on iPhone (2023)

How to Cancel My Peacock Subscription
