![How to Make a Cardboard Car [12 Easy Steps]](https://www.thebigpicturemovie.com/wp-content/uploads/2023/01/How-to-make-a-cardboard-car.jpg)
How to Make a Cardboard Car [12 Easy Steps]
Are you wondering how to make a cardboard car? There are only 12 easy steps to follow, as outlined below.
It is a fun activity to make a cardboard car from a moving box. It can keep a toddler or small child entertained for hours.
Let’s get started.
Things You Needs To Make a Cardboard Car
- Cardboard box
- Pencil
- Box cutter
- Some glue
- Acrylic Paints
- A paintbrush or spray paint
The Best Craft Tool
Before we proceed towards the steps, we recommend our favorite tool for crafting with kids: a low-temperature Glue Gun.
It has all the handy crafty ability of a standard glue gun with more crafting tools for kids ages 5 and 6. It will help them to learn how to handle tools with skills while saving them from burns.
Steps for Making a Large Toy Car from Cardboard
- Find a rectangular cardboard box from a home improvement store. But ensure the person you are making the car for can easily fit inside it. Large moving boxes will be preferred.
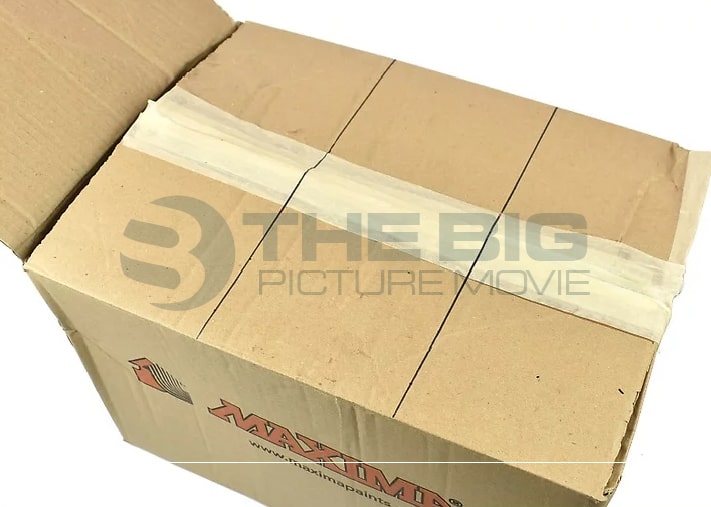
- Tape the bottom of the cardboard box closed and use enough tape to cross the bottom length wiseat least 2 or 3 times.
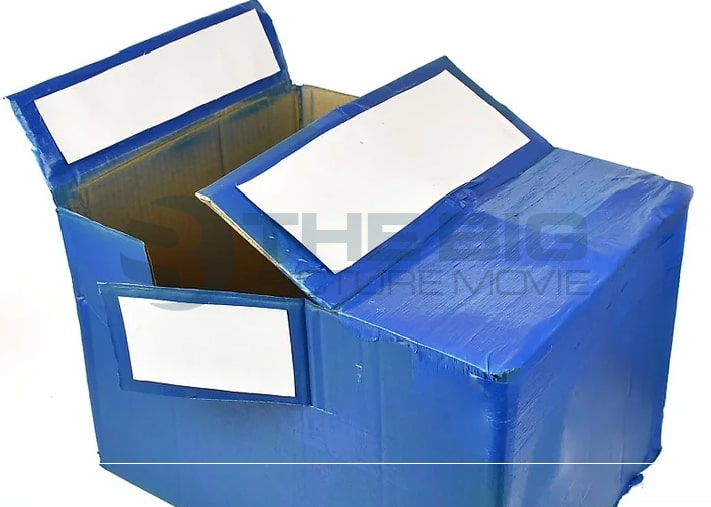
- Fold 1 of the short flaps inside the box and leave the other 1 outside the box. Now, tape the 2 long flaps together to close the top of the box. The short outside flap will be the back of the car.
- Use a yardstick to measure the length of your box and divide that length into thirds. Use a pencil to draw 3 equally-sized sections on each box’s 2 long sides.
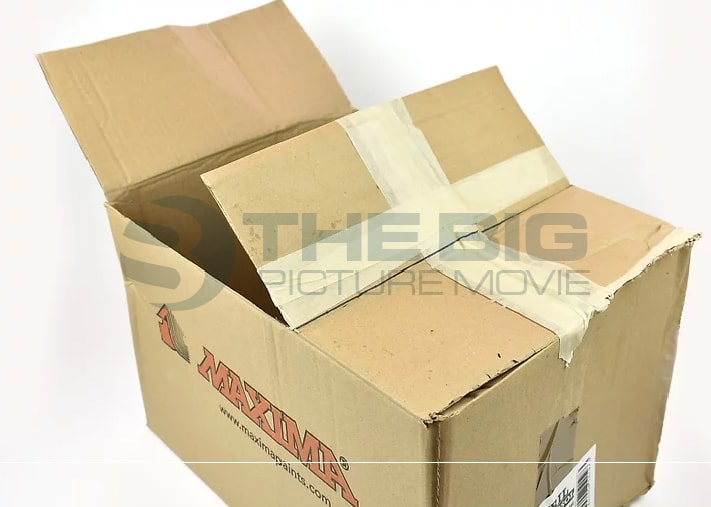
- Start cutting from the back of your box;cut 1 part of the box’s top to separate it from the box’s side. Stop cutting when you reach the front third of the box. Then, repeat the same process on the other. side of the box.In the end, the back two-thirds of the top will be separated from the sides of the box.

- Fold the top flap inward and tape the 2 halves of the top flap together horizontally with packing tape.

- Repeat the same process with the back flap.
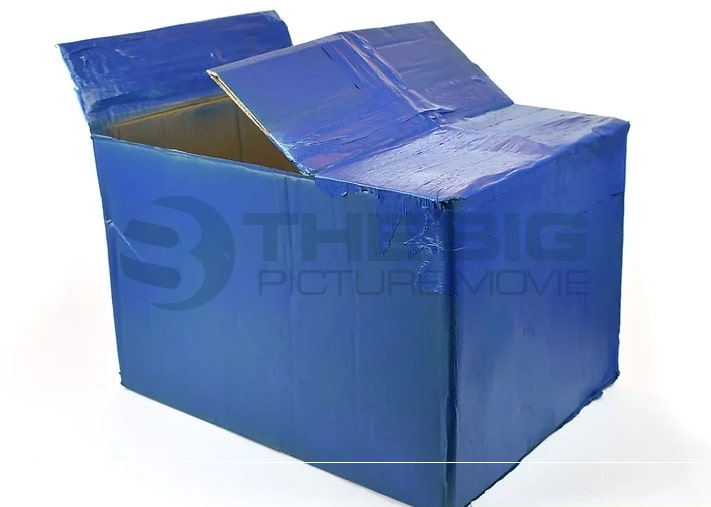
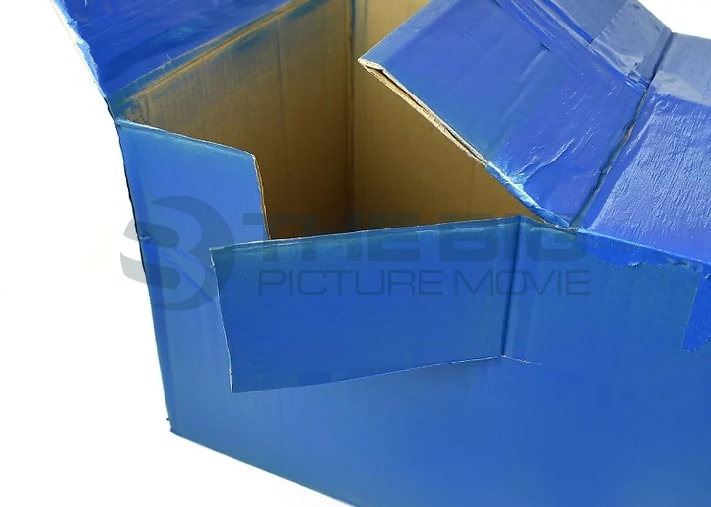
- You can paint the outside of the box red, blue, black, or any color, or leave the exterior as-is-it. Use acrylic paints and a paintbrush to cover the entire box’s surface in an even coat of paint. Now let it dry for an hour before a move to the next step.
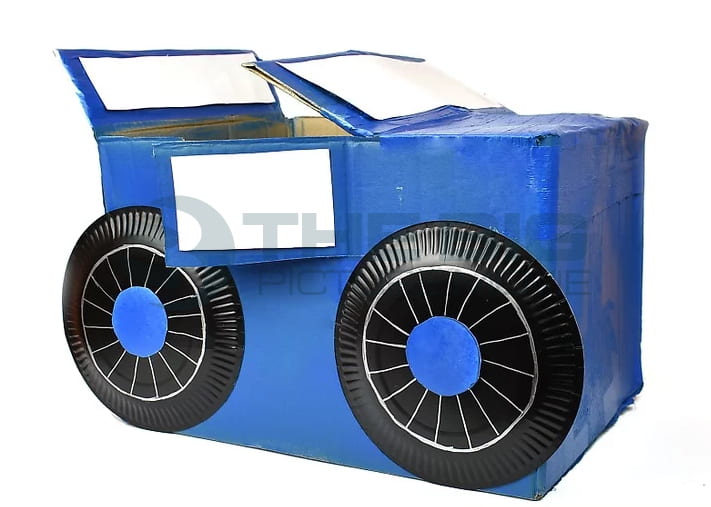
- To make open and close the door, cut along the vertical line nearest the back of the car, which you sketched earlier, and the bottom of the box. Don’t cut along the vertical line in order to swing the door.
- Now make windshields and windows for your car. Measure 1-3 inches from the sides of the front and back flaps while drawing a rectangle. Then, make your windows by sketching squares in the 2 doors.
- Make the car’s wheels from paper or plastic plates and cut circles out of another piece of cardboard. Paint the wheel black and put it 6 inches away from the car’s front and rear. Cover strips of cardboard with duct tape to make rims and glue them onto the wheels.
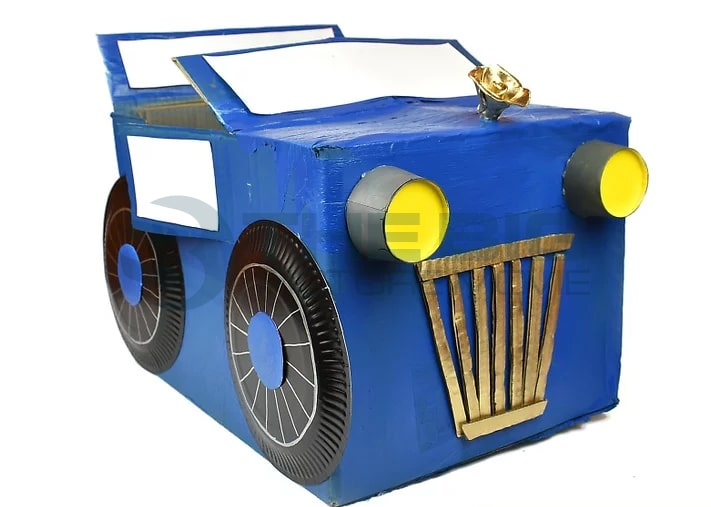
- At last, complete your car with headlights, a license plate, and a grill. For headlights, cut small circles from cardboard, paint them yellow, and glue them onto the car’s front.For the grill, cut rectangular cardboard strips covered in duct tape and paste it on the front of the car.
Conclusion
Hopefully, you love this easy method of cardboard cars, which inspires hours of creative play once completed. If you are going to try these DIY craft ideas, please let us know how you like them.
Have fun!
Related Posts

How To Like a Text on Android and iPhone